Home

Monday, April 16, 2007

SharePoint V3: Configure BDC Search Scope, Add Search Tab, Modify Search Scopes Drop Down

In Microsoft Office SharePoint Server 2007 search scopes allow you to define a portion of an index according to content sources and content types. MOSS also supports searching line of business data, such as structured data that exists in a SQL Server database.

The instructions below explain how to create a custom search scope for the Adventure Works DW SQL Database, how to add an Adventure Works search tab, and how to add Adventure Works to the search scopes drop down. This example assumes that the Adventure Works database has already been defined in the Business Data Catalog.

Create and Configure the Adventure Works Search Scope

SSP > Search Settings > Scopes > View Scopes > New ScopeTitle: Adventure WorksTarget Results Page: Use the Default Search Results Page (for now)Click OK
Adventure Works Search Scope > Edit Properties and Rules > Rules > New RuleScope Rule Type: Content SourceContent Source: AdventureWorksDWBehavior: IncludeClick OK

Create Adventure Works Search and Search Results Pages

Navigate to the Search Center
Site Actions > View All Site Content > Pages > New > Page

Title: aw.aspx
URL: Pages/aw.aspx
Page Layout: Search Page
Click Create

Site Actions > View All Site Content > Pages > New > Page
Title: awresults.aspx
URL: Pages/aw.aspx
Page Layout: Search Results Page
Click Create

Configure the Adventure Works Search and Search Results Pages

Open the aw.aspx pageSite Actions > Edit PageSearch Box Web Part > Edit > Modify Shared Web Part > Miscellaneous
Target Search Results Page URL: awresults.aspx
Click OK

Open the awresults.aspx page
Site Actions > Edit PageSearch Core Results Web Part > Edit > Modify Shared Web Part > Miscellaneous
Scope: Adventure Works

Create and Configure the Adventure Works Search Tabs

Open the search.aspx page
Site Actions > Edit Page > Tabs > Add New Page
Tab Name: Adventure Works
Page: aw.aspx

Open the searchresults.aspx
Site Actions > Edit Page > Tabs > Add New Page
Tab Name: Adventure Works
Page: awresults.aspx


Update the advanced search links on each custom search page

Modify the Search Scopes Drop Down

Home > Site Actions > Site Settings > Modify All Site Settings > Site Collection Administration > Search Scopes
Click "Display Group: Search Dropdown"
Edit Scope Display Group
Enable the Adventure Works scope by checking it and assigning it an order number

Friday, April 06, 2007

SharePoint V3: How the Site Directory Works

When you create a site collection using the Collaboration Portal template, a site called "Sites" is created by default and it comes wired with a site directory. The out-of-box site directory includes three tabs: Categories, Top Sites, and Site Map.


Categories and Top Sites rely upon information stored in the Sites list while the Site Map is automatically rendered.

When you click the Categories tab, you are viewing the categories.aspx page. When you click the link for a category, you are brought to the categoryresults.aspx page. When you click on the Top Sites tab, you are brought to the topsites.aspx page. When you click on the Site Map tab, you are brought to the sitemap.aspx page.

The aspx pages are stored in the Pages document library (Sites > View All Site Content > Pages).


The Categories Tab

The default categories that appear in the site directory are Division, Region, and Tasks and Tools. These are column names in the Sites custom list (Sites > View All Site Content > Sites > Settings > List Settings). The sub-categories (e.g. beneath Region there is Local, National, and International) are column values for the column. In the case of Region, Region is a choice column in the Sites custom list and Local, National, and International are available values for that column.

The Sites custom list has several views. The Categories view defines what is shown on the Categories.aspx page. For example, if you open the Categories view (Sites > View All Site Content > Sites > Settings > List Settings > Views > Categories) you will see that the three columns that are checked are Division, Region, and Tasks and Tools. These represent the categories that are visible on the Categories.aspx page.


Another important view in the Sites custom list is the Site Creation Categories view. This view defines what categories appear when a new site is created. For example, if you click Site Actions > Create Site you will see that the bottom of the new site page includes check boxes for Division and Region. This is because Division and Region columns are checked in the Site Creation Categories view.


Listing Sites in Site Directory

When you create a new site and indicate that you want it to be listed in the site directory, and you specify which categories you want it listed under, a new list item is created in the Sites custom list. For example, if you click Site Actions > Create Site and you create a site called Test Site 1, listing it under all possible site categories, then a new list item is created in the Sites custom list.


The Division and Region values you specified when you created the site appear as properties data for that list item. Since you selected all of the possible Division and Region values when you created Test Site 1, you can test the way the site directory works by clicking on one of these categories in the site directory.

Navigate to Sites and click on the Local subcategory beneath Region. You will see Test Site 1 listed in the results.


You can add previously created sites to the site directory by creating new list items in the Sites custom list.


Specifying a Different Site Directory

If you delete the default Site Directory site and create a new one you will notice that the site creation options for listing new sites in a site directory are no longer available. In order to associate site creation to a Site Directory other than the default one, you need to specify this new Site Directory.

Navigate to Home > Site Actions > Site Settings > Modify All Site Settings > Site Collection Administration > Site Directory Settings. Here you can define the location of the Site Directory. You can also enforce site creation options from this screen.

Under Promise and Over Deliver

When project sponsors for business application projects are gearing up for a new project they are exposed to products, lingo, marketing material, and all the things that create a buzz. Often times they see demonstrations or presentations that glorify the technologies (that is how these things are sold, right?). Sponsors are sold on ideals. They see a fine tuned demo and are convinced they can have the same thing.

Its great to experience the hype and the excitement of a new project, however, when a project is set in motion a reality check can quickly screech the record player...a message that there are technical limitations preventing a particular goal to be achieved as it was initially designed.

A big part of being satisfied at the completion of a project, is having accurate expectations when the solution design is established. This means being educated about the limitations and obstacles you will face along the way, before you even begin constructing. It also means being cautious about making promises.

Tuesday, April 03, 2007

SharePoint V2: ERROR: CREATE DATABASE permission denied in database 'master'. (Error code: 262).

Description:

From SharePoint Central Administration, attempting to create a new configuration database results in an error: "Error CREATE DATABASE permission denied in database 'master'. (Error code: 262)."


Solution:

* Start > Programs > Administrative Tools > IIS Manager > SharePoint Central Administration Web Site Properties > Home Directory Tab: Note the Application Pool Name (e.g. StsAdminAppPool).

* Start > Programs > Administrative Tools > IIS Manager > StsAdminAppPool Properties > Identity Tab: Set the user name and password to be the same as the database service account.

* Start > Run > IISRESET

Monday, April 02, 2007

SharePoint V3: Enabling PDF File Type in Office SharePoint Server 2007

For 32 bit:

* Download Adobe PDF IFilter located at:
http://www.adobe.com/support/downloads/detail.jsp?ftpID=2611

* Stop the IIS Admin service.

* Start > Settings > Control Panel > Add Remove Programs: Deinstall previous versions of Adobe PDF IFilter.

* Run the PDF IFilter install executable (e.g. ifilter60.exe). The default install directory is:
C:\Program Files\Adobe\

* Download the 17X17 PDF icon as PDFICON_SMALL.GIF, located at:
http://www.adobe.com/misc/linking.html

* Copy the gif file to:
Program Files\Common Files\microsoft Shared\Web Server Extensions\12\Template\Images

* Backup the DOCICON.XML file, located in:
Program Files\Common Files\microsoft Shared\Web Server Extensions\12\Template\XML

* Edit DOCICON.XML, adding a Mapping key for PDF (e.g. mapping value=" PDFICON_SMALL.GIF" key="PDF")

* Start > Run > IISRESET

* Shared Services Administration: SSP > Search Settings > File Types: Add PDF

* Shared Services Administration: SSP > Search Settings > Content Sources: Start a Full Crawl


For information on 64 bit, refer to Mauro's blog post:
http://blogs.officezealot.com/mauro/archive/2007/05/15/20352.aspx

Friday, March 30, 2007

Visual Studio 2005: Display Line Numbers Globally

Tools > Options > Text Editor > All Languages > Text Editor > Display > Check Line Numbers

Visual Studio 2005: Error: Setup Failed

Description:

Error:
Setup Failed


Solution:

The failed setup issue was caused by latency on the network. The setup files were located on a remote, mapped network drive.

To sucessfully install Visual Studio, perform the following steps:
* Clear the temp folder.
* Start > Run > %Temp% > Delete files.
* Copy the setup files locally.
* Run setup.exe.

Thursday, March 29, 2007

SharePoint V2: Error: HTTP 404: File Not Found Internet Explorer

Description:

Errors:
* Service Unavailable
* HTTP 404: File Not Found Internet Explorer.

After installing Macromedia RoboHelp to a SharePoint Portal Server 2003 web server, the existing SharePoint portals were returning the "Service Unavailable" error. RoboHelp was deinstalled from the server. Now, attempts to hit the SharePoint portals from Internet Explorer were behaving oddly. Using the FQDN (e.g. http://portalname.domain.com) in the URL was resulting in a 404 error. However, it was possible to hit the portal sites using the IP address and manually typing default.aspx (e.g. http://192.168.1.10/default.aspx).


Solution:

* Backup IIS Metabase:
IIS Manager > Right Click the IIS Server Node > All Tasks > Backup/Restore Configuration > Create Backup

* Compare Metabase Configurations:
C:\Windows\System32\inetsrv\history > Locate the current metabase xml file and the most recent, valid one prior to the faulty installation attempt.


In this particular case we used an xml compare tool and identified that the current IIS Metabase had been corrupted by the faulty Robohelp installation. We found that the web services section of the current IIS Metabase was missing these entries below, preventing SharePoint from processing the HTTP requests.


* 1,C:\Program Files\Common Files\Microsoft Shared\Web Server Extensions\60\isapi\owssvr.dll,0,Windows SharePoint Services,Windows SharePoint Services
* 1,C:\Program Files\Common Files\Microsoft Shared\Web Server Extensions\60\isapi\shtml.dll,0,Windows SharePoint Services,Windows SharePoint Services
* 1,C:\Program Files\Common Files\Microsoft Shared\Web Server Extensions\60\isapi\_vti_adm\admin.dll,0,Windows SharePoint Services,Windows SharePoint Services
* 1,C:\Program Files\Common Files\Microsoft Shared\Web Server Extensions\60\isapi\_vti_aut\author.dll,0,Windows SharePoint Services,Windows SharePoint Services

* Restore a Valid Metabase Configuration:
IIS Manager > Right Click the IIS Server Node > All Tasks > Backup/Restore Configuration > Highlight valid backup prior to faulty installation > Restore

* Validate:
After restoring a valid IIS Metabase backup, the SharePoint portals were functioning properly. They became accessible both through FQDN or IP Address.

Notes:

* It is not recommended to use this solution every time an IE 404 error is encountered. There are several possible causes for the IE 404 error. This example is one scenario where an IE 404 error was encountered and IIS Metabase restore happened to be the solution. It is recommended to fully investigate an issue and taking proper precautions before applying this solution.

* It is a good idea to take IIS Metabase backups prior to installing software to a web server that would alter the IIS configuration. Having the IIS Metabase backup handy provides an extra safety net in the event that a configuration needs to be rolled back.

Wednesday, March 21, 2007

SharePoint V3: Configuring Custom NewForm.aspx, EditForm.aspx, DispForm.aspx

NewForm.aspx, EditForm.aspx, DispForm.aspx represent the web pages that the SharePoint user sees when they click the New , Edit, or Display actions from a custom list web part tool bar, or from an "Linked to Edit Item" drop down.

In SharePoint deployments, it is fairly common to have a requirement to override these pages with custom pages. You would want to do this when you want to hide fields from a user, or when you want to enhance the appearance of the page for the user.

One example of where I needed to do this is on a custom list where I had configured a SharePoint Designer workflow. The workflow was fairly complex and I had configured some extra fields on the custom list to facilitate the workflow. I didn't want the users to see these extra fields when they were creating, editing, or viewing items in the list so I had to hide these fields.

Here are the steps to configuring custom NewForm.aspx on an existing custom list. These steps may also be used to configure custom EditForm.aspx or DispForm.aspx.

* SharePoint Designer > File > Open Site
* Expand the lists folder
* Expand the custom list that you are modifying
* Double click NewForm.aspx to open it
* File > Save As
* Name the custom list something unique (do not overwrite the default NewForm.aspx) e.g.
* NewFormCustom.aspx
* You will see a generic SharePoint control in the center of the page with column 1, column 2, column 3
* Right click the SharePoint control that is in the center of the NewFormCustom.aspx page, Cut to remove it from the pageInsert > SharePoint Controls > Custom List Form
* Right click within the Custom List Form SharePoint control to invoke the menu.
* Modify the Custom List Form SharePoint control.
* File, Save
* Right click the custom list container > Properties
* List Properties > Supporting Files Tab > Configure this tab accordingly, pointing NewItemForm to NewFormCustom.aspx
* Apply, OK
* File, Save

If you need the revert back to the original NewForm.aspx, you can open the list properties from SharePoint Designer, navigate to the Supporting Files tab, and point the NewItemForm property back to NewForm.aspx. Furthermore, if the requirements change, the original NewForm.aspx is still in tact and you have the option to create additional, custom NewForm.aspx pages.

Words of caution about working with the NewForm.aspx, EditForm.aspx, and DispForm.aspx:
* Always create a web part template of the custom list or document library as a backup, before making changes
* If the custom list or document library has workflow, take the additional step of creating a site template or backup the site collection entirely using stsadm
* Never rename the default NewForm.aspx, EditForm.aspx, or DispForm.aspx pages. This will corrupt the custom list. When you click on Edit Item you will receive an error, "Invalid URL." Instead use the steps above.
* After switching to the custom form, attachments are no longer supported on the custom list. If you try to add an attachment you will get an error, "This form was customized not working with attachment."


UPDATE:

Microsoft published a knowledge base article addressing the attachment issue:

Microsoft KB 953271:
Error message when you try to attach a file in a custom form on the Web site in Windows SharePoint Services 3.0: “This form was customized not working with attachment"
http://support.microsoft.com/kb/953271

Friday, March 16, 2007

SQL Server: Query Server Name, Edition, Product Level, Product Version

Run this query for the SQL Server name, edition, product level, and product version:

SELECT
SERVERPROPERTY('SERVERNAME') AS 'Server Name',
SERVERPROPERTY('EDITION') AS 'Edition',
SERVERPROPERTY('PRODUCTLEVEL') AS 'Product Level',
SERVERPROPERTY('PRODUCTVERSION') AS 'Product Version'


Refer to Microsoft KB
321185 titled, "How to identify your SQL Server version and edition" to identify which service pack corresponds with the product version number.

SharePoint V3: Subtle Behaviors with Custom Site Tab and Site Column Groups

First one has to do with custom site templates (.stp). Starting from a site, if you navigate to Site Actions > Create > Sites and Workspaces and you look at the Template Selection section you will always see Collaboration, Meetings, Enterprise, Publishing tabs. If you have created at least one custom site template (.stp) then you will see a Custom tab as well. If you navigate to the site template gallery /_catalogs/wt/forms/common.aspx and delete your custom site templates (don't delete the forms folder) then you were to go back to the Create Site page you will see that the Custom tab has disappeared.

A similar behavior exists within the Site Column. From the home page if you navigate to Site Actions > Site Settings > Modify All Site Settings > Site Column Gallery. MOSS 2007 allows you to create new site columns groups when you create new site columns. You may also add a new site column to an existing group. The subtle behavior here is that if you move all of the site columns out of one particular site column group, then that group name will disappear. You need at least one site column to be added to the site column group in order for the group name to exist.

Wednesday, March 14, 2007

SharePoint V3: Master Page Not Inherited By Non-Publishing Sites

Description

We encountered an issue where we had deployed a custom master page but not all of the sites in the site collection were recognizing the changes.

First, a little background on what we had done:
We opened the home page (a publishing site) of a SharePoint V3 site collection in SharePoint Designer. Next we copied the default.master and renamed the copy to custom.master. In custom.master we changed the logo in the header of the page to a custom image. Next, we opened the site collection in Internet Explorer and in Site Settings > Look and Feel > Master Page changed the Site Master page to custom.master. We clicked OK to save changes and reviewed the top level site. The header logo was updated. Next we reviewed another top level site, but these sites did not have the new header logo.

Solution


Site Settings > Look and Feel > Master PageSite Master Page:
* Select Specify a master page to be used by this site and all sites that inherit from it.
* Select custom.master from the drop down selection.
* Check off Reset all subsites to inherit this Site Master Page Setting

Site Settings > Look and Feel > System Master PageSite Master Page:
* Select Specify a master page to be used by this site and all sites that inherit from it.
* Select custom.master from the drop down selection.
* Check off Reset all subsites to inherit this Site Master Page Setting

The way this works is that the "Master Page" setting is used by publishing sites. The "System Master Page" is used by non-publishing sites. The terminology used in SharePoint V3 and SharePoint Designer are not intuitive, although the descriptions on the Site Settings > Look and Feel > Master Page do help a bit.

Thanks Marc Anderson for taking the time to read the small print and explain this out loud.

For further explanation, refer to Kathy's blog post,
SharePoint Designer Snippets: Working with Master Pages, which helps clarify any confusion regarding this topic.

To expand on this blog post, I think of the Site Settings > Look and Feel > Master Page like this:

* Master Page = Custom Master Page = Publishing Sites
* System Master Page = Default Master Page = Non-Publishing Sites

SharePoint Designer Workflow: It's Just a Facilitator

SharePoint Designer workflow in general is best used as a facilitator of actions that make up a business process and it does not work well for automating or enforcing an entire, complex, human process. What I mean is that SharePoint Designer workflow is best used to automate certain actions that occur within a business process like assign a status of something, or email something, or copy something but its not going to replace human decision making and its not going to perform the entire business process for you.

Say, for example, that Company ABC's IT team is supporting 100 employees through email exchanges. When an employee has an issue, they email an IT distribution list then the IT staff responds to the issue. The IT team is finding that they are struggling to keep track of the support requests. They are considering using SharePoint to track support requests.

A solution to this business problem may be to use SharePoint to structure the metadata about support requests and use workflow to automate actions that occur during the process. Create a SharePoint custom list to track support requests with request id, requestor email, status, title, description, solution fields, and then use SharePoint Designer workflow to perform the following:

* Automatically generate request id for new support requests
* Automatically build and send email the requestor when status of items is changed

SharePoint Designer should not be used to implement rigid rules that contain deep branchings for how the support requests are resolved. You do not want to attempt to create a workflow that predicts and solves the support requests that you are tracking within SharePoint. Thining through and resolving support requests is a complex human process and it scales beyond practical limits of SharePoint Designer workflow.

Workflow can certainly improve processes, and it can simplify tasks that a person performs during a business process, such as the example above....just don't expect workflow to do somebody's job for them.

Friday, March 02, 2007

SharePoint V3: Error: Excel Services: Access Denied

Description:
Error: "Access Denied. You do not have permissions to open this file on Excel Services. Make sure that the file is in an Excel Services trusted location and that you have access to the file."


The Excel Services is properly enabled and Excel Services trusted file locations have been properly configured in SharePoint Central Admin. Your user account has access to the Office SharePoint Server 2007 document library that you are trying to publish an Excel workbook to, however, you receive an Access Denied error when attempting to publish an Excel 12 workbook to the document library.


Solution:
Open the Shared Services Admin Site

Central Admin > Application Management > Create or Configure this Farm's Shared Services > SSP > Open Shared Services Admin Site
Set the Unattended Service Account

Shared Services Admin > Excel Services Settings > Edit Excel Services Settings > External Data > Unattended Service Account

Thursday, March 01, 2007

SharePoint Intranets, Evolving Beyond Department Sites

I admire software application, user interfaces that are built around a purpose. The most popular business application in the world, Microsoft Outlook is a great example. It provides messaging, task management, calendar management, and more. The buttons and menus are organized in a manner that is suitable for sending email or tracking a task. The user interface is intuitive, easy to use, and makes sense.

I think a trend for SharePoint intranet deployments is that they will include designs which are less influenced by content categorization and taxonomy and more influenced by functionality.

When you think of various SharePoint intranets that are being used in businesses today, you might struggle to draw a correlation between the user interface and the functionality. I think that has a lot to do with the fact that implementers are responsible for coming up with a design, a context. I think a common habit among implementers has been to design the applications around organizational structure of the company. When SharePoint sites first started popping up, they weren't much more than web folders for documents, and their main "purpose" was sharing documents as an alternative to a file share. So, the user interface design took on a shape similar to how documents are categorized in a folder share. I think that categorizing documents by department resulted in a trend of SharePoint portals that have a department based design.

I think a challenge now is to recognize where SharePoint came from, that department site designs are out of date, and applications built on it are no longer just HTTP enabled versions of Windows Explorer. We are now dealing with real business applications with real (and custom) purpose. User interfaces need to evolve accordingly.

If you've spent a significant amount of time performing a job function as a SharePoint portal user, in an environment that is organized by department you may have come to the realization like I have that organizing collaborative or actionable content and information according to department doesn't make a lot of sense all the time.

One way to evaluate this is to think about the audience (I mean audience in the general sense) the sites's information is addressed to and what the audience is supposed do with the information. You might find that when the audience doesn't have to "do" anything with the information other than consume it then it might work well in a department site. For example, an announcement is posted to an HR department web site that there is a new employee handbook. The audience simply consumes this information. They are not expected to collaborate and edit the handbook. In this example the department site probably works ok.

Its really when you start getting into information that you are working with when department sites start to fall apart. Collaboration using list items, documents, forms, and workflow occurs around a subject, not around a department. So why try to categorize the information you use to collaborate on, into a department? A SharePoint user who is performing a function doesn't care "who" owns the content any more then they care when it was created. It would make more sense to me if the user interface design promoted what users are actually doing in the system as opposed to who owns the subject matter that the user is working with.

Effective Security Model for SharePoint

Creating an effective, scalable security model and governance plan for a SharePoint implementation is one of the most important and intricate aspects of a SharePoint deployment. Developing a security model usually requires cooperation from from a lot of different people. It requires communication with the business groups for articulating the security requirements of their content, the security people for communicating the policies (such as Sarbanes Oxley), interpreters of these requirements for designing a consistent roles based structure and naming convention (in AD and SharePoint) and IT staff responsible for managing the provisioning and deprovisioning.

Much like the user interface of SharePoint is an open canvas, the security model offers lots of room for creativity, though the efforts are mostly transparent to the end users. When designing a security model, I like to thing about things like what size is the user base, what is the organizational structure of the company, how do the business units interact with each other, what are the security policies in the company, how strict must the security on the content be, is the IT staff willing to accept the responsibilities, etc..

As a rule of thumb (with exceptions of course), I don't create SharePoint users, instead I create SharePoint groups and corresponding AD groups. I like to manage the memberships exclusively in AD. Another thing I try to avoid doing is creating roles based solely on org charts. If an organization is collaborative enough that they are implementing SharePoint, then chances people are interacting outside of their immediate department anyways. Most workspaces and content are custom and besides; departments change and reorganizations happen.

There is a significant effort that goes with keeping the security model in good shape. Limit SharePoint security to roles based groups, keep all of the group membership management in AD, and have a consistent organized pattern and naming convention. When that is all set, spend a some time developing the following two reports:


  • A report that shows Sharepoint Site, SharePoint group names, access levels
  • A report that shows AD groups, member names, and email addresses, nested groups and their members
...then you have an effective security model.

Friday, February 16, 2007

Quick Overview: Installing Microsoft Office SharePoint Server 2007, Single Server

Here is a quick overview of the steps you might take to install Microsoft Office SharePoint Server 2007 in a single server farm environment.

Verify Prerequisites Microsoft Office Server System Requirements

Begin Installation
Set Up Wizard: Product Key, Agree to Terms
Set Up Wizard: Installation Type = Advanced
Set Up Wizard: Server Type = Complete
Installation Complete

Begin Configuration Wizard
Configuration Wizard: Connect to a Server Farm = No, I want to create a new server farm
Configuration Wizard: Database Settings
Configuration Wizard: Configure Security Settings = NTLM
Configuration Wizard: Confirmation
Configuration Wizard Complete

Begin Central Admin
Central Admin > Operations > Services on Server > WSS Search Settings: Set Service Account, Set Content Access Account
Central Admin > Operations > Services on Server: Start MOSS Search Service
Central Admin > Operations > Services on Server > MOSS Search Settings: Query and Indexing:
Check Use this server for indexing content
Check Use this server for serving search queries
Set Farm Search Service Account
Central Admin > Application Management > Create or Extend Web Application: Create a new Web application
Start > Run > CMD: iisreset /noforce
Central Admin > Application Management > Create or configure this farm's shared services: New SSP
Central Admin > Application Management > Manage this Farm's Shared Services > SSP Name: Create a new Web application
Central Admin > Application Management > Manage this Farm's Shared Services > My Site Location: Create a new Web application
Central Admin > Application Management > Manage this Farm's Shared Services: Verify Farm's Shared Services
Central Admin > Application Management > Create Site Collection (Collaboration Portal Template)
Central Admin Complete

Monday, February 12, 2007

How to Create a Filtered Roll-Up of Announcements for SharePoint V3 Home Page

I am constructing a Marketing Portal for a client using Office SharePoint 2007. Besides the home page, the site collection has four top level sites, "Advertising", "Direct Marketing", "Public Relations", and "Team Sites." "Team Sites" contains a number of sub-sites.

The client requested that I place an Announcements web part on each site so that the departments can post their own announcements to their own sites. They also requested that on the home page I display all of the announcements from Advertising, Direct Marketing, and Public Relations....but not to display those announcements that are posted to Team Sites or any of its sub-sites.

I had to think of a way to use out of box functionality to roll up some, but not all of the announcements within the site collection and display them on the home page. Below is an explanation of what I did:

1.
Site Settings > Galleries > Site Content Types Created two content types:


  • Site Collection Announcements Content Type
  • Team Sites Announcements Content Type

2.
Home Page > View All Site Content > Create > Communications > Announcements > Created two webparts:

  • "Template-SiteCollectionAnnouncements" for (Advertising, Direct Marketing, and Public Relations sites)
  • "Template-TeamSiteAnnouncements" (for the Team Sites)
3.
Announcement Web Part > List Settings > Advanced Settings > Content Types > Yes
Enabled management of content types on the lists.


4.
Anouncement Web Part > List Settings > Content Types > I deleted the default "Announcement Content Type" from each list

On "Template-SiteCollectionAnnouncements," I added the content type of "Site Collection Announcements Content Type"

On "Template-TeamSitesAnnouncements," I added the content type of Team Site Announcements Content Type

5.
I saved each Announcement list as a list template: "Template-SiteCollectionAnnouncements" and "Template-TeamSitesAnnouncements."

6.
On each of the sites, Advertising, Direct Marketing, and Public Relations, I created a new web part from the Template-SiteCollectionAnnouncements web part templates. On each of the Team Sites, I created a new web part from Template-TeamSitesAnnouncements. I added the web parts to the respective pages.

7.
To achieve the filtered roll up effect on the home page I added a Content Query Tool Part. I set the web part to show all items from all sites in the site collection where the content type is "Site Collection Announcements Content Type" and the list type is "Announcement."

In conclusion, I was able to achieve the desired results with out of box functionality. If you are using Content Query Tool Part and you are looking for a way to filter the list, consider doing what I did; create custom content types and filter out the content types within the Content Query Tool Part Query screen.

Thursday, February 08, 2007

SharePoint V3 STP's Containing SharePoint Designer Workflows

I finished creating a SharePoint V3 site that contains five custom list web parts and a total of ten SharePoint Designer workflows (each list has two workflows). I was anxious to find out what happens if I create a site template (.STP) from the site and then create a new site from that .STP file. I wanted to see what would happen to the workflow. I wanted to answer these questions:

"What happens when you create an STP from a SharePoint V3 site that has SharePoint Designer workflow?"
"How do I migrate workflows from one Web Application to another?"

Here is what I did:

  • Saved Site as a Template (Site Actions > Site Settings > Save Site as Template)
  • Created Site from Template (Site Actions > Create > Sites and Workspaces > Select Template)
Here is what I observed on the Site:

  • All five custom list web parts were available
  • The custom list columns were intact
  • The default custom list view "all items" was intact
  • The custom list current views showing on the site were only showing the title column (must do Site Actions > Edit Page > Edit Web Part > Modify Shared Web Part > Selected View [View Name] > OK and then the current view of web part is updated properly on the page)
  • After performing an action that would initiate a workflow, the workflow status became “Failed on Start (Retrying)”
Here is what I observed in SharePoint Designer:

  • The workflow definitions were intact (.ASPX, .XOML, .XOML.RULES, .XOML.WFCONFIG.XML)
  • I could open the workflows (File, Open Workflow)
  • The Conditions and Actions were intact
  • When I clicked “Check Workflow”, I got the message “The workflow contains no errors.”
  • When I clicked “Finish”, I didn't get any errors
So, I went back to the site and to the custom list that had “Failed on Start (Retrying)” message. I tried a second time to initiate the workflow. This time I watched the status go from “In Progress” to “Completed.” The workflow is one that produces an ID number on a list item and the ID number was present upon completion of workflow, so I know this workflow was working.

One by one I opened each workflow in SharePoint Designer and clicked “Finish.” Then I tested all ten workflows and they worked fine.

In summary, if you create a site template (.STP) from an existing site that contains SharePoint Designer workflows, then after you create a new site from that .STP file, you should expect the following clean up tasks:


  • Refresh the current view of all web parts that have workflow: Site > Site Actions > Edit Page > Edit Web Part > Modify Shared Web Part > Selected View [All Items] > OK
  • Refresh the workflows in SharePoint Designer: SharePoint Designer > File > Open Workflow > Finish

Wednesday, February 07, 2007

Resetting SharePoint Designer's Layout

As I was working with a SharePoint worfklow I accidentally closed a task pane and minimized another. SharePoint Designer suddenly looked foreign. Luckily there is a quick fix for this. If you ever want to reset SharePoint Designer back to the way it looked when you opened it for the first time, just click on Task Panes > Reset Workspace Layout.

Tuesday, February 06, 2007

Backup Script For Office SharePoint Server 2007

Create Backups Directory
Create a backup directory for storing the scheduled SharePoint backups (e.g. c:\backupsharepoint)

Create Bat File Directory
Create a directory for storing the backup script file (e.g. c:\scriptssharepoint)

Create Bat File
Create a bat file using the code below, modified for your environment. Use UNC paths when using in a server farm environment.

@echo off
echo ====================================================
echo Backup Script For Office SharePoint Server 2007
echo ====================================================
cd \program files\common files\microsoft shared\web server extensions\12\bin

@echo off
stsadm.exe -o backup -url http://servername -filename c:\backupssharepoint\backupsharepoint.dat -overwrite
@echo off
echo completed


Schedule bat file
Schedule the backup to run frequently, during off peak hours.

Open Start > Programs > Accessories > System Tools > Scheduled Tasks
Add a Scheduled Task

Scheduled Task Welcome Screen, Click Next
Click the program you want Windows to run, Click Browse
Select the backupsharepoint.bat file you created (e.g. c:\scriptssharepoint\backupsharepoint.bat)
Name the task, Schedule it (e.g. Daily)
Start Time, Frequency, Start Date
Username and Password (use a domain user account that has proper permissions and non expiring password )
Finish


Verify Backups
Keep the backup directory secure. Monitor the job to ensure the job is running properly. Perform test restores from the backup files.

Friday, February 02, 2007

Behaviors of Site Columns of the type Choice

I created a site column in Central Admin. Then I added the site column to a custom list. I was able to modify the choice options of the site column instance. This can be a good thing but not sure if it defeats the purpose of a site column. I found that if I want to reset the local instance back to the values of the main site column definition, then I can go back to Central Admin and update the site column, and the updates will override the modified instance that I had created in my list.

Copying a SharePoint Designer workflow

I am working on a SharePoint site that has multiple custom lists. Each list will have a SharePoint Designer workflow attached to it. The workflows are very similar to eachother. Each workflow is several branches long so it takes quite a bit of clicking to set one up.

I figured after I was done with the first workflow I would copy it, paste it, rename it, and point it to the second list, then change workflow conditions and actions accordingly. However, when I opened the workflow copy I discovered that the custom list assignment had become greyed-out and I am unable to point it to a different list.

This has got me wondering why Designer locks down the list name and if there is a way to work around this manually.

Error occurred on custom list, referring to a SharePoint Designer workflow

SharePoint Designer workflow doesn't clean up after itself very well. Here is an example.

Create list and add it to a SharePoint V3 page. Open SharePoint Designer and add a workflow to the list. SharePoint will add the workflow status to the current list view. This tells you the current state of the workflow.

Now that the workflow is created and the status of the workflow is visible on the custom list current view, go ahead and delete the workflow from SharePoint Designer. Next, go back to the custom list and perform an action that would have kicked off that work flow. You will see "error occurred" on the custom list current view when you do this even though the workflow no longer exists.

To fix this you have to modify the list view, remove the workflow status from the list view, then on the page where you are displaying the web part, modify web part and update view, refresh the screen. Doing this will remove the orphaned workflow status from the list view and it will also remove this orphaned workflow status option from the edit view screen.

Tuesday, January 30, 2007

Microsoft Office SharePoint Server 2007: Cannot connect to the configuration database

You receive a "Cannot connect to the configuration database" error message when you connect to your Windows SharePoint Services Web site. For troubleshooting this issue, refer to Microsoft KB Article 823287 .

This article covers the most common causes that would occur in a real environment. I want to add that I received this error in a virtual pc environment when I accidentally allocated 128MB to the vpc instead of the 1024 I intended. At 128MB the SharePoint server choked and sql didn't start properly and it resulted in this message. After recreating the vmc using 1024MB memory, then I was able to open the site with no problems.

Friday, January 26, 2007

MOSS 2007: The backup/restore failed because there is already another job scheduled.

If you run a backup/restore job from SharePoint V3 Central Admin and the job fails, then it may leave a job timer in the Jobs Definition page. You need to delete this timer before you can run the backup/restore utility successfully. If you don't delete the timer job then you may receive this error:

"The backup/restore failed because there is already another job scheduled. Delete the timer job from the Timer Jobs Definition page, and then restart the backup/restore job. "


In Central Admin > Operations > Global Configuration, click on Timer job definitions.


Click the timer job with the title of "backup/restore."
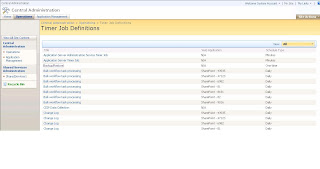
Delete the timer job.


Now you should be able to run the backup/restore from Central Admin.


Wednesday, January 24, 2007

Microsoft Office SharePoint Designer (Contributor Mode)

Ever find your SharePoint Designer in Contributor Mode?
Here is how to turn it off: Site > Contributor Settings > Disable Contributor Settings

Wednesday, January 10, 2007

File Naming Convention

I got in the habit of naming files a certain way so that I could archive them and not have to worry about categorizing them into the correct folders. If I need to find something I can sort and scroll or use desktop search to find it.

First thing about the naming convention, I don't put any spaces in the name. Second, I prefix the file name with the date e.g. YYYYMMDDFileName. If the day or month is a single digit number then I put a 0 in front of it so that the prefix is always the same length e.g. 20070110. Since files travel from system to system, this naming convention ensures that the created date won't be lost. It allows the files to be sorted by date. Thirdly, it provides a versioning mechanism because when you save the file again tomorrow the date is different.

If the document is a certain type such as note, template, invoice, quote, etc., then I put the type right after the date. E.g. 20070110InvoiceVendorName. This way when I sort I can find all of the same type on the same day.

Finally, I put the most unique part of the name at the end. E.g. 20070110InvoiceMicrosoft.

The name might look funny, but it works. And, when storing the files in a SharePoint environment you can always display the friendly title of the document on the document library view instead of the actual file name.

Tuesday, January 09, 2007

Software Solution Project Planning

I like to use the following six project phases when creating an software solution project plan. I always start with these phases at the top level, then indent detailed tasks and subtasks beneath each respective phase.

Discovery
Assessment
Design
Construction
Validation
Rollout

These project phases can be applied to projects small and large. It works for new projects or add-ons to existing projects. One pattern that occurs is that the series of phases will cylce. For example, perhaps you implemented a line of business web application. Over the course of time, the requirements change and enhancements are requested. You are naturally led back into the discovery phase where you begin the cycle again. You define what enhancements are needed, you design a solution, you build it, test it, and roll it out.

SharePoint V3 brings makes project charting more realistic for small projects. Previously, creating a project plan could take as long as a small project. However, with the project-lite features and a little bit of templating on your part to reuse previous efforts, its quick to set up the plan and execute. Doing this can help you and anybody else who has an interest in what you are doing.

Monday, January 01, 2007

SharePoint V3: Workaround for creating a unique id for list items and documents

SharePoint V3 does not provide a good way to uniquely id list items and/or documents. However, the SharePoint Designer workflow capabilities can be used to configure a workaround.
One way to ensure a unique id is to create the id number based on current date and time, down to the precision of a second. This method won't provide a sequential id number for items in a list or document library, but in many real life scenarios as long as the id number is unique, it will suffice.
SharePoint offers a calculation field type for lists and document libraries. This is great for performing the calculation of the id number. However, you do not want to store the id number in this type of field because it is dynamic and the value it generates will change based upon the system. What I mean is, if you generate a unique id off of the created field, then some how the created date is changed, the value of your calculation will be compromised. This happens if you move item from one web part to another. So, instead, it is best to store the id number in a text field where it is safe.
SharePoint V2 didn't allow you to copy a value from a calc field to a text field, but, V3 offers workflow and it allows you to do this.
In this example, I will demonstrate how to generate a unique id for custom list items. The result is a unique id (although not sequential) that is stored in a single line text field.

1. Create a site in the portal to contain the demo custom list
2. Create a custom list with the following fields

  • Title (single line text)
  • Notes (mulitple line text)
  • ItemIDText (single line text)
  • ItemIDCalc (calculated, single line of text)
3. Set the ItemIDCalc field to this regular expression:
=MID(YEAR([Created]),1,4)&IF(LEN(MONTH([Created]))=1,"0"&MID(MONTH([Created]),1,1),IF(LEN(MONTH([Created]))>1,MID(MONTH([Created]),1,2)))&IF(LEN(DAY([Created]))=1,"0"&MID(DAY([Created]),1,1),IF(LEN(DAY([Created]))>1,MID(DAY([Created]),1,2)))&IF(LEN(HOUR([Created]))=1,"0"&MID(HOUR([Created]),1,1),IF(LEN(HOUR([Created]))>1,MID(HOUR([Created]),1,2)))&IF(LEN(MINUTE([Created]))=1,"0"&MID(MINUTE([Created]),1,1),IF(LEN(MINUTE([Created]))>1,MID(MINUTE([Created]),1,2)))&IF(LEN(SECOND([Created]))=1,"0"&MID(SECOND([Created]),1,1),IF(LEN(SECOND([Created]))>1,MID(SECOND([Created]),1,2)))

4. Create a view for the list displaying all of the fields

5. Using Sharepoint Designer, open the site

6. File, New, Workflow

7.
Name the workflow as "ItemID Workflow"
Set the workflow to start automatically when item is created or manually
Click Next

8.
In Step 1 of workflow:
Set the condition as If Created equals ListName: Created
Set the action as Update item in ListName
Field = ItemIDText
Value = ListName: ItemIDCalc
Click Finish

9.
Add a new item to the list. Populate the Title and Notes field. Click ok. You will see that the item is created and that the ItemIDCalc field and ItemIDText Field automatically populate with a unique item id.

Monday, November 27, 2006

Microsoft Office Sharepoint Server 2007 (Beta)Setup ErrorsSetup is unable to proceed due to the following error(s):This product requires Windows Workf

When installing MOSS 2007 Beta2 on an SPS2003 environment during an upgrade attempt, I received the following error:

------------
Microsoft Office Sharepoint Server 2007 (Beta)Setup ErrorsSetup is unable to proceed due to the following error(s):This product requires Windows Workflow Foundation Beta 2 (Build 3.0.3807.7 or later).Please refer to this readme file for instructions to obtain these pre-requisites. Correct the issue(s) listed above and re-run setup.

-------------

My action steps were as follows:

1. Remove .NET 3.0 framework using the Pre-released Microsoft .NET Framework 3.0 Uninstall Tool

http://www.microsoft.com/downloads/details.aspx?familyid=AAE7FC63-D405-4E13-909F-E85AA9E66146&displaylang=en

2. Install Windows Workflow Foundation Runtime Components Beta 2_2(EN) for x86.exe

https://www.microsoft.com/downloads/details.aspx?familyid=5C080096-F3A0-4CE4-8830-1489D0215877&displaylang=en

After I completed these steps I was able to install MOSS 2007 Beta 2.

Saturday, November 25, 2006

The Value of Having a Separate "Admin" Portal

Sharepoint portal deployments can be complicated to manage. They can include several customizations that make restores, upgrades, and day to day maintenance more difficult to perform.

Think about all of the data that is necessary to maintain in order to effectively manage Sharepoint.

Contact information
Invoices, subscription information
License compliance reports
Hardware (make, model, sn, RAID, tech support information)
IP addresses
Port numbers
SSL certficates
Users, passwords
Portal area security hierarchies
Group memberships
Service identities
IIS host headers
IIS app pool identities
Area/site templates
Unghosted pages
Branding, modifications to OWS.css, Menu.css, SPS.css, ..OWSPERS.css, OWSmac.css, OWSnocr.css, Paystub.css
Custom image files
Custom animation files (swf files)
Third party add-ons
Custom web parts (dwp files, assembly files, aspx files)
Custom javascript e.g. custom_owj.js
Data view, custom data sources to line of business databases
Custom security, site groups, ad groups, audiences, web part
Connected web parts
Dependency information
Datasources pointing to Sharepoint content db
Linked servers
Instruction documents
Backup and restore procedure
Support procedures
Log files
Code templates
Branding templates
Answers
Notes

One solution I have found to be very helpful is to deploy a separate Sharepoint portal with the sole purpose of maintaining administrative information. I like to keep it vanilla so that I can quickly restore it independently from the main portal(s). I find that it is really easy to lock down the portal when you are only going to allow administrators to access it.

Tuesday, November 21, 2006

SQL Server 2005 install error 70233

While I was installing the SQL Server 2005 Prerequisites I came accross this error:

"Errors occurred during the installation: Beta Components Detected. Error 70233 installing .NET Framework 2.0."

After running the utility provided by the link below, the installation was able to successfully continue http://go.microsoft.com/fwlink/?LinkID=47598

Tuesday, November 14, 2006

Upgrading to Sharepoint V3: The "Other" Option

Microsoft offers four options for upgrading SharePoint V2 to SharePoint V3. These approaches describe how to take your V2 Portal or Site Collections and upgrade the underlying software to V3.

In-Place Upgrade
Gradual Upgrade
Gradual upgrade for Shared Services
Content Database Migration

To view detailed comparison of these options, visit Microsoft TechNet's Determine upgrade approach [Office SharePoint Server].
http://technet2.microsoft.com/Office/en-us/library/f11e6c4f-dc2a-4d17-a2c8-9455792b4b9b1033.mspx

I want to also introduce another option. In fact I like to refer to it as the "other upgrade option." The way I describe this is that you install a fresh V3 portal and you recreate manually, then migrate data and content. This allows you an opportunity to first re-think the design of each part of the new portal, instead of automatically inheriting the limited configurations that you have in V2.

In some cases, I think that running an upgrade can be a mistake. As you know, performing a software upgrade to V3 doesn't automatically result in a robust V3 environment that suddenly fulfills all of your needs and desires...it just puts your same old portal on new software that happens to be capable of doing more. You still have to due necessary diligence to figure out how you are going to leverage the new functionality to meet business needs. This is a manual process. There are no short cuts. And, in some cases, by upgrading content from V3 to V7 you are actually creating more work for yourself.

Implementing new portal technology is kind of like traveling from point A to point B. Point A represents the portal concept and design that you arrive at after you analyze the business requirements, draw scribbles on the whiteboard, and have some meaningful discussions about the portal you are going to build.

A (idea) -----> B (reality)

Point B is reality. It is the end product; an actual, tangible Sharepoint 2007 environment configured the best possible way to resemble your concept.

And, the V2 portal is simply an outdated Point B.

Consider too, that the business requirements that drove the V2 portal probably have become more complex. V2 users may be wanting more sophisticated functionality by now. If time and budgets allow, don't automatically assume the limitations of a V2 portal when the subject of Sharepoint V3 comes up. Implementing V3 may be a great opportunity to re-engineer the portal solution and selecting the "other" upgrade option of redefining and creating your V3 portal from your ideas instead of from your V2 portal may result in a better solution.

Tuesday, October 24, 2006

Links: SharePoint

All Versions
Microsoft Office SharePoint Server 2007 products comparison download
Penny Coventry: Sharepoint Version Table
Heather Solomon: CSS Quick Reference
Heather Solomon: CSS Reference Chart for Sharepoint 2003

Version 3
Microsoft TechNet: Office SharePoint Server 2007
Microsoft TechNet: Upgrading to Office SharePoint Server 2007
Microsoft TechNet: Determine upgrade approach (Office SharePoint Server)
Microsoft Office Online: Microsoft Office SharePoint Server 2007 Frequently Asked Questions
Jason Medero: WSS V3/MOSS 2007 Upgrade and Migration from V2: Part 1 of 2
Jason Medero: WSS V3/MOSS 2007 Upgrade and Migration from V2: Part 2 of 2
Joel Oleson: Troubleshooting & Logs during a WSS/MOSS Upgrade
Shane Young: Upgrading from SPS 2003 to MOSS 2007 Beta2 TR using the gradual approach
Jonathon Frost: Preparing for a SharePoint Server 2007 Upgrade
James Henry: SPS 2003 to MOSS 2007 Upgrade Issues
William Baer: Understanding PRESCAN.EXE in MOSS 2007
Bill English: Moving SPS 2003 Databases to new SQL Servers
MSDN: Best Practices for Ensuring Application Reusability and Upgrade in Windows SharePoint Services
Joel Oleson: Best of... Upgrade and Deployment Guides for WSS v3 and Microsoft Office SharePoint Server 2007

Version 2
MSDN: Branding a SharePoint Portal Server 2003 Site: Part 1, Understanding the Use of a Corporate Brand
MSDN: Branding a SharePoint Portal Server 2003 Site: Part 2, How to Apply Your Own Corporate Brand
Dr. Dobbs: Sharepoint Web Part Development

Version 1
Microsoft: How to Create a Personal Dashboard in SharePoint Portal Server
Microsoft: Programs That Cannot Coexist with SharePoint Portal Server
Microsoft: Accessing a Workspace Using HTTPS Does Not Work, Dashboard Error -2147221499
Microsoft: Setup FAQ and Troubleshooting Guide
Microsoft: IIS Lockdown Tool Affects SharePoint Portal Server
Microsoft: Errors When Antivirus Software Scans Web Storage System
Microsoft: Indexing Web Sites on the Internet
Microsoft: Portal Displays Incorrectly When You Use FQDN
Microsoft: Required Properties Not Enforced During Bulk Check-in
Microsoft: SharePoint Portal Server and Storage Area Networks

Monday, October 02, 2006

Using the Web Service Interface of Windows SharePoint Services (2003)

Web services available in Windows SharePoint Services:

Administration
Administrative methods for managing a deployment of Microsoft Windows SharePoint Services, such as for creating or deleting site collections.
http://server_name:5966/_vti_adm/Admin.asmx

Alerts
Methods for working with alerts for list items in a SharePoint site.
http://server_name/_vti_bin/Alerts.asmx

Data Retrieval Service
Methods for retrieving schemas and data.
http://server_name/_vti_bin/DspSts.asmx

Document Workspace
Methods for managing Document Workspace sites and the data they contain.
http://server_name/_vti_bin/DWS.asmx

Forms
Methods for returning forms used in the user interface when working with the contents of a list.
http://server_name/_vti_bin/Forms.asmx

Imaging
Methods that enable you to create and manage picture libraries.
http://server_name/_vti_bin/Imaging.asmx

Lists
Methods for working with lists and list data.
http://server_name/_vti_bin/Lists.asmx

Meetings
Methods that enable you to create and manage Meeting Workspace sites.
http://server_name/_vti_bin/Meetings.asmx

Permissions
Methods for working with Windows SharePoint Services security.
http://server_name/_vti_bin/Permissions.asmx

Site Data
Methods used by search services to extract and crawl data from SharePoint sites.
http://server_name/_vti_bin/SiteData.asmx

Sites
Methods for returning information about the collection of site templates on the virtual server.
http://server_name/_vti_bin/Sites.asmx

Users and Groups
Methods for working with users, site groups, and cross-site groups.
http://server_name/_vti_bin/UserGroup.asmx

Versions
Methods for working with file versions.
http://server_name/_vti_bin/versions.asmx

Views
Methods for working with views of lists.
http://server_name/_vti_bin/Views.asmx

Web Part Pages
Methods to send information to and retrieve information from XML Web services.
http://server_name/_vti_bin/WebPartPages.asmx

Webs
Methods for working with sites and subsites.
http://server_name/_vti_bin/Webs.asmx

SharePoint Products and Technologies (2003): GetUserProfileByName(String) Method

SharePoint Products and Technologies (2003) SDK Documentation

Methods
Method:
GetUserProfileByName(String) Method.
The GetUserProfileByName method of the UserProfile service gets user profile property information by account name.

Parameters
Parameter: AccountName
The account name that specifies the user profile property.
Return ValueMicrosoft.SharePoint.Portal.UserProfiles.PropertyData that contains the user profile property information.

Exceptions
Exception Type:
UserNotFoundException Class.
Condition: User is not found.

Requirements
Platforms: Microsoft Windows Server 2003.
Security:
Code Access Security.

Blog Archive

Followers